

 English
 Español
 русский
Barbecue Grill Mesh Bag: A Deep, Practical, and SEO-Focused Guide for Outdoor Cooking
Content
- 1 The non-stick reusable barbecue grill mesh bag—materials, safety, and core advantages
- 2 Using a barbecue grill mesh bag for vegetables—texture, flavor, and step-by-step method
- 3 Master seafood with a barbecue grill mesh bag for fish and shrimp
- 4 barbecue grill mesh bag vs grill basket—which tool fits your cooking style?
- 5 Essential barbecue grill mesh bag cooking times and temperatures
The non-stick reusable barbecue grill mesh bag—materials, safety, and core advantages
What the mesh bag is and how it works
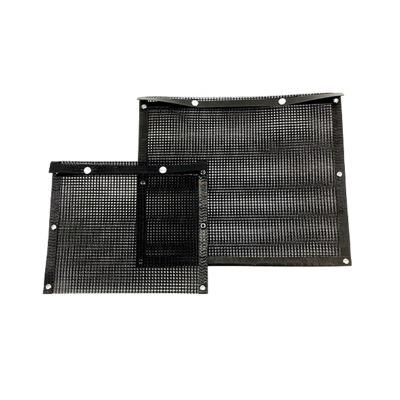
A non-stick reusable barbecue grill mesh bag is a flexible, perforated cooking envelope that holds smaller or delicate foods and lets flame-kissed heat and smoke circulate freely. The woven mesh—often a heat-resistant fiberglass cloth coated with a non-stick layer—is engineered to allow air and vapor to pass through while preventing food from falling into the grates. Unlike solid pans that block airflow, the mesh bag promotes browning, supports gentle dehydration for crisp edges, and reduces flare-ups because fat drips away quickly. The result is a combination of searing, smoking, and roasting behavior that produces complex, savory flavors without losing tiny items between the bars of your grill.
Performance benefits and safety practices
When you close the latch and place the bag on preheated grates, you can flip an entire batch at once and maintain uniform exposure to heat. That saves time and cuts down on fussy tongs work, especially with thin-sliced peppers, onion petals, small mushrooms, halved Brussels sprouts, shrimp, or delicate fish. For best results, lightly oil the inside of the bag and the food surface; this increases browning, improves non-stick behavior, and helps seasonings adhere. Keep the bag away from roaring flames; medium to medium-high heat zones create better Maillard reactions with fewer burn risks. If your grill has hotter and cooler zones, start in the hotter area to initiate browning, then move to a moderate zone to finish the interior gently. Using heat-proof gloves, open the bag for steam to escape before serving; this prevents condensation from softening crusts.
Selecting size and weave for your grill
Choose a bag footprint that fits your cooking surface without draping over edges. A tighter weave helps retain very small items like corn kernels or diced zucchini, but slightly wider weaves improve air and smoke flow for faster browning. Think of it like choosing a camera lens: a narrow aperture (tight weave) offers control and containment, while a wider aperture (open weave) captures more of the grill’s character. If you regularly grill fish fillets and asparagus spears, a medium weave is a versatile middle ground. Consider handle styles and closures; a smooth, secure latch is easier to open with gloves, and reinforced seams endure repeated flipping.
Care, cleaning, and lifespan
After cooking, let the bag cool, then wipe away residue with warm water and a mild detergent. Avoid abrasive pads that could scratch the non-stick layer, and avoid metal tools inside the bag. Dry fully before storage to protect seams. With proper care, a non-stick reusable barbecue grill mesh bag withstands dozens of sessions while delivering consistent results. If food begins to cling more than usual, refresh non-stick performance by re-seasoning with a light coat of high-heat cooking oil before use.
- Preheat the grill to stabilize heat before the bag touches the grates.
- Oil lightly—too much oil can pool and smoke without improving browning.
- Flip the whole bag, not individual pieces, for uniform doneness.
- Vent steam by cracking the latch briefly to keep edges crisp.
Using a barbecue grill mesh bag for vegetables—texture, flavor, and step-by-step method
Prep, seasoning, and oiling
Vegetables love direct heat and a whiff of smoke, and a barbecue grill mesh bag for vegetables is the easiest way to give them both without losing slivers to the fire. Aim for uniform cuts so pieces cook at the same rate. Dry moisture with a towel, then toss with a modest amount of oil to promote browning and prevent sticking. Season boldly; salt draws out vegetable juices that mingle with surface sugars, accelerating caramelization. For water-heavy produce like zucchini, salt for a few minutes and pat dry before bagging to reduce sogginess. Layer hardy aromatics—smashed garlic, thyme sprigs, or chili flakes—so they infuse the batch without burning. Close the bag, shake to distribute, and you’re ready to grill.
Advanced techniques for caramelization
Use two temperature zones: start hot to sear surfaces, then move to a moderate zone to finish the interior. If you want pronounced grill marks through the mesh, press the bag briefly with a spatula as the pieces sear. Sweet vegetables such as carrots or bell peppers benefit from a tiny drizzle of honey or balsamic during the last minute—added sugars brown quickly and can scorch if added early. For smoky complexity, add a handful of soaked wood chips to the coals or a pellet tube; the mesh allows thin blue smoke to bathe every surface evenly, something closed pans can’t match. Shake the bag occasionally so edges rotate and no piece monopolizes the hottest spot.
Avoiding sogginess and uneven doneness
Soggy vegetables usually come from overcrowding, excess moisture, or insufficient heat. If steam has no path to escape, it condenses and softens crusts. Keep batches moderate, pat wet vegetables dry, and preheat thoroughly. When you hear a lively sizzle as the mesh meets the grate, you’re in the right temperature window. If you see beading moisture inside the bag, crack the latch momentarily to vent. Finish with acid—lemon, vinegar, or a squeeze of tomato—to brighten flavors without softening texture.
Batch cooking and mixed veggie packs
For mixed packs, group vegetables by density: start carrots and potatoes first, then add peppers and onions, and finish with zucchini or mushrooms. Label bags with a clip so you remember which batch needs more time. This staged approach gives you a platter where every piece tastes intentionally cooked, not averaged into mush. A barbecue grill mesh bag for vegetables also enables meal prep: grill extra portions to top salads, fill wraps, or stir into grains during the week.
- Cut consistently to avoid undercooked cores and overdone edges.
- Use high-heat oils; reserve butter or sugary glazes for the finish.
- Vent the bag if steam collects; audible sizzle is your friend.
- Stage dense vegetables before delicate ones for perfect timing.
Master seafood with a barbecue grill mesh bag for fish and shrimp
Picking cuts and sizes that grill well
Seafood shines on the grill when heat exposure is controlled and surfaces don’t tear. Fillets about 1–2 cm thick, firm white fish, skin-on pieces, and butterflied shrimp are ideal. Very thin or ultra-delicate fillets are prone to flaking; the mesh bag contains them gently while letting hot air and smoke circulate. Pat seafood dry, then add a film of oil to both the fish and the inside of the bag. This coupling of oil layers minimizes sticking and supports even browning.
A friction-free, reliable process for delicate proteins
Preheat the grill and the empty bag for 30–60 seconds so the first contact begins searing immediately. Lay fillets or shrimp in a single layer, close the latch, and set the bag over a medium-high zone. After a minute or two, give the bag a careful flip to expose the other side. Because you’re flipping the entire batch, fragile pieces stay aligned and intact. When protein turns opaque and flakes gently, or shrimp curl into a loose “C” with pink, translucent centers just turning white, move the bag to a cooler zone to coast to doneness. For a buttery finish, add a pat of butter or citrus zest in the final minute, then open the bag to release steam and preserve texture.
Flavor pairings and smoke layering
Seafood loves bright acidity and herbs. Lemon, lime, dill, parsley, or a light brush of garlic-oil deliver big flavor without masking natural sweetness. If you like smoke, use a mild wood such as fruitwood; the mesh ensures even exposure with no soot buildup. Place thin lemon slices beneath fillets inside the bag for a built-in aromatic platform that also helps prevent sticking. For shrimp, a quick marinade—no longer than 20–30 minutes—adds depth without turning the texture mealy.
Troubleshooting flaking, sticking, and dryness
If fish sticks, it’s often a sign of wet surfaces or a grill that wasn’t hot enough at first contact. Dry thoroughly, oil lightly, and preheat more. If pieces flake excessively, reduce handling and rely on the bag’s batch flipping. If shrimp turn rubbery, the heat was too high for too long; use a hot start for color, then slide to a cooler zone and let carryover complete the cook. With the right rhythm, a barbecue grill mesh bag for fish and shrimp gives you succulent interiors and crisp, gently charred edges every time.
- Dry, oil, and preheat for non-stick success.
- Flip the bag, not the fish, to protect delicate flesh.
- Finish with acid and herbs to highlight natural sweetness.
- Use cooler zones to avoid overcooking thin pieces.
barbecue grill mesh bag vs grill basket—which tool fits your cooking style?
Heat flow, turning ease, capacity, and cleanup
Both tools solve the same core problem—keeping small foods out of the fire—yet they behave differently. A mesh bag delivers higher smoke contact and batch flipping that keeps fragile items aligned, while a rigid basket offers a sturdy platform for tossing and stirring. If you prefer hands-off, flip-once cooks with even exposure, the bag excels. If you enjoy stirring like a wok and crisping edges aggressively, a basket may fit better. In practical backyard use, many cooks keep both; but if you must choose one, think about the foods you grill most often and your comfort with turning hot food frequently.
Who should choose what, and why
Grillers who prioritize delicate seafood, mixed vegetables, or small diced items tend to prefer the bag’s containment and non-stick convenience. Those who cook hearty chunks of potatoes, thick asparagus, or meat cubes at very high heat may lean toward a basket’s rigidity and surface area for vigorous tossing. In short sentences: the bag flips batches cleanly; the basket rewards active stirring. Both work, but they have different personalities.
Side-by-side comparison
In words: the mesh bag promotes more uniform smoke access and reduces the chance of pieces falling into the fire; the basket can create darker sear on heavy items because you can toss them directly against metal. The table below distills the contrasts.
| Feature | Mesh Bag | Grill Basket |
|---|---|---|
| Heat & Smoke Flow | Excellent flow through flexible mesh; even exposure | Good, but perforations may be larger/fewer |
| Turning Method | Flip entire batch at once with one motion | Toss or stir frequently with tools |
| Delicate Foods | Superior containment and non-stick support | Good, but fragile items can tear when stirred |
| Searing Power | Strong browning; gentler on very thin pieces | Very strong browning when tossed against metal |
| Cleanup | Fast; wipe and wash inside/outside of bag | Fast; scrub rigid surfaces and corners |
| Storage | Folds flat; minimal space | Rigid; needs more cabinet room |
- Choose a mesh bag if you grill lots of small or delicate items.
- Choose a basket if you like high-energy tossing and ultra-deep sear.
- Owning both covers every scenario without compromise.
Essential barbecue grill mesh bag cooking times and temperatures
Factors that change time on the grill
Thickness, starting temperature, grill fuel type, and how often you open the lid all shift timing. Thicker pieces need gentler heat after an initial sear; cold food from the fridge lags behind room-temp batches; charcoal heat can spike higher than gas and creates hot and cool pockets. The mesh bag’s airflow generally trims cook times compared to solid pans because moisture escapes easily, but it also means food can overcook if left unattended. Build repeatable habits—consistent cuts, well-defined heat zones, and minimal peeking—to make your timing trustworthy.
Practical doneness checks without gadgets
Visual and tactile cues work well. Vegetables are ready when edges brown and a fork slides in with slight resistance. Shrimp form a loose “C” and turn pink with just-opaque centers. Fish flakes in broad, moist segments, not chalky shards. Meat cubes spring back slightly when pressed and show clear juices. Because you cook through a bag, open the latch briefly to test; this vent also protects crisp edges from steam.
Time & temperature reference table
In sentences: start most foods over medium-high heat to set color, then finish over medium heat to cook through without scorching. The table provides a practical baseline; adjust for thickness, grill variability, and personal preference.
| Food | Grill Temp (Approx.) | Typical Time in Mesh Bag | Doneness Cues |
|---|---|---|---|
| Asparagus (medium) | Medium-high | 6–8 minutes, shaking once | Tender-crisp, lightly charred tips |
| Bell Pepper Strips | Medium-high | 8–10 minutes | Edges browned, flesh still juicy |
| Mushroom Halves | Medium-high then medium | 10–12 minutes | Moist interior, deep brown surfaces |
| Shrimp (medium) | Medium-high | 4–6 minutes | Pink, opaque, loose “C” curl |
| Fish Fillet (1–2 cm) | Medium-high then medium | 6–9 minutes | Flakes gently, glossy moisture remains |
| Chicken Thigh Pieces (2–3 cm) | Medium then medium-low | 14–18 minutes | Juices run clear; resilient to touch |
| Steak Cubes (2–3 cm) | High then medium | 6–10 minutes | Surface browned; interior to preference |
| Zucchini Half-Moons | Medium-high | 7–9 minutes | Edges caramelized, centers tender |
Food-safe handling, resting, and carryover tips
Keep raw and cooked foods separate, use clean utensils after flipping, and rest thicker items for a couple of minutes so juices redistribute. Carryover heat is real in a mesh bag; as soon as you remove it from the grill, the enclosed hot air continues to cook the food briefly. Open the latch to release heat if pieces are already at your target doneness. With practice, these habits make barbecue grill mesh bag cooking times and temperatures highly predictable and repeatable.


Message Us Right Now!
- Phone: +86-18651171105
- Fax: +86-18651171105
- Email: yaxing@yaxing.com
- Address: No. 18, Yongxin East Road, Gaogang District, Taizhou City, Jiangsu Province, China.
Copyright © Yaxing Plastic Industry Co., Ltd. All Rights Reserved. Custom High-End Precision PTFE Series Products Manufacturers 